Chimney Relining is a job that can be done by the do it yourself homeowner but seems to be a project that the "unknown" or lack of knowledge seems to scare many away from. Hopefully we can change that.
This page covers chimney relining using a stainless steel flexible chimney liner and being hooked up to a fireplace insert as it is one of our most common applications. We will go on to cover as many other types of installations including flue only, tee through wall thimble style, pre-fabricated chimney to an insert, and any others we can think of or get questions about.
If you have any questions about when a chimney reline is needed, how to install and insulate a chimney liner, or what the difference in chimney liners is or what type you should use for your situation, these topics are covered through the links below.
When do I need a Chimney Reline?
What type or grade of chimney liner do I need?
The first thing to do when installing a chimney liner to a fireplace insert is checking the inside dimensions of the flue. Then check the location of the exhaust opening on the fireplace insert to make sure it will clear the lentil bar and have enough room for the chimney liner to enter it or the insert boot (if used)correctly. Then based on the size of the flue, and the requirements of the inserts exhaust specification, choose a chimney liner that at least meets the minimum exhaust requirement of the fireplace insert and will have enough room to fit down the chimney correctly. It is recommended that the outlet size of the unit be used instead of downsizing any time the flue will allow it.
When choosing a liner size it is recommended to have at least 1 1/2" extra room if planning to use a blanket style insulation to properly insulate the liner. Also make sure if the flue tiles have settled and are offset (not perfectly lined up end to end) to reduce your actual inside dimension by that amount.
If there is not enough room for blanket style insulation, or you plan on using a mix and pour style insulation, it is recommended to have at least an inch larger inner diameter flue then the liner diameter, minus any offset in the flue tiles.
If needed, it is not uncommon practice to remove the original clay flue tiles to make enough room for a proper sized liner. It is highly recommended that proper a proper insulation package is used to meet the UL Zero clearance standard when the tiles are removed, or in any installation for that matter.
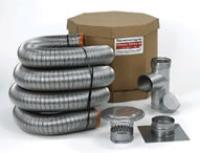
After finding the correct size liner for the job, make sure all the components you will need are on hand before starting the job. For chimney reline going from the top of the flue terminating at a fireplace insert, here is a typical list of parts needed:
1. Flexible chimney liner
2. Top plate that will cover opening/tile at the top of the chimney and overlap slightly to keep the elements out
3. Top clamp if needed. Light weight liners usually have this built into the collarplate, heavy liner usually need this to support the weight.
4. Rain cap. Most kits include one of these to fit as a package but an existing cap may be usable depending on the parts involved.
5. Insert adapter to allow a strong connection into the collar of the insert or insert boot if used.
6. Insert boot - needed if the insert has a flush opening instead of a collar to make an attachment. Some boots also make the job easier by allowing the chimney liner to enter at an angle giving a lot of flexibility on hooking the liner to the unit, especially in tight situations.
7. Chimney Liner Insulation - Either a blanket style kit or pour and mix type of insulation. It is very important to insulate a chimney liner to keep your warranty through most manufacturers and can prevent service and safety issues as well.
8. Also optional is an end cone or bell that attaches on the end of the liner being fed into the chimney and helps it find its way over irregularities while installing the liner.
Click on the links below for instructions on how to insulate a chimney liner and FAQ on the importance of a properly insulated chimney reline.
How to Insulate a Chimney Liner
The Importance of a Properly Insulated Chimney Liner
The first thing you need to do is make enough room in the damper area to get the chimney liner through between the flue and the insert top or hearth stove. Usually there is not enough room for this to happen without removing some material.
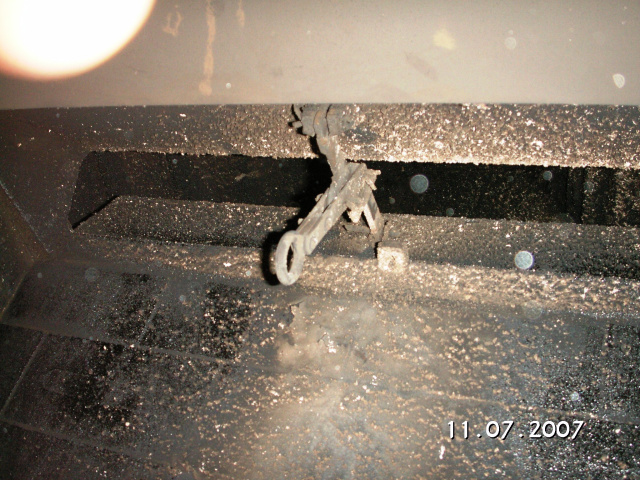
NOTE: IF YOU HAVE A METAL FIREBOX INSTEAD OF FIREBRICK/MASONRY FIRE BOX this step will involve cutting or grinding of the metal box, which of has room vents built into it around the fireplace opening will render the open fireplace operation of the unit useless permanently without costly or impossible repair as smoke could then enter the vents back into the room without the liner carrying the smoke.
If it is a standard brick and mortar firebox this usually involves grinding and removing the rear lower portion of the damper housing and probable removal of one or more firebricks to allow for the liner to pass through.
Once the liner can pass through the damper correctly it is time to install the liner.
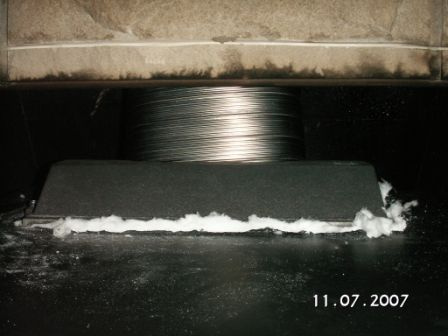
If you plan to use a blanket style insulation it's time to do this now!
Once insulated if using blanket chimney liner insulation you’re ready to go.
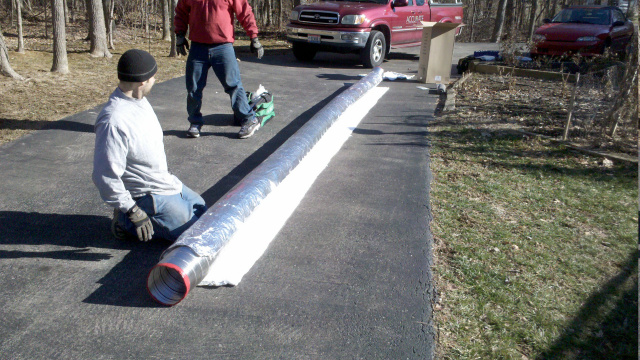
It is preferred by most to do this from the top whenever possible. One reason is gravity. Another is the space needed inside and trouble it can be feeding an entire liner off the floor across the hearth through the damper and into the flue can be difficult and messy.
If you decided to get an end cone/bell attach it at this time and tie your rope to it.
I suggest getting someone to help as even short light weight liners can be hard to handle by yourself.
!!ALWAYS MAKE SURE THERE ARE NO POWER LINES IN THE AREA WHERE THE CHIMNEY LINER, LADDER, OR ROOF ACCESS WILL BE!!
Drop the rope if you have a cone and aim the leading end of the chimney liner into the flue. Arch the chimney liner in as large a radius as you can to prevent slitting of the insulation blanket if already installed, and start feeding the liner down the chimney. Once the length of the liner becomes manageable the second person (if you have one) can go down to the firebox to guide it with the rope if used or give visual instructions if it gets hung up.
Once the liner has cleared the flue and passed through the damper housing remove the cone/bell you need to install the appliance connector to the end of the liner and pre-fit your insert boot if you are using one.
Pre-Fit the boot by mounting it on the insert first. Usually you want to place it as far back as possible to give you as much room as possible between the chimney liner and the lentil bar or front of the damper housing. If you have enough room to fit the insert into the firebox with the boot mounted, leave it on. If clearance is too low remove the boot and attach it to the appliance connector that was previously installed. The holes in the insert will be ready to line up and screw in now which is a big help.
Measure the height of the unit (with the boot) and drop the liner to within a couple of inches of the insert height off the floor of the fireplace.
If you insulating with a pour and mix insulation, now is the time.
Slide the insert in, lining it up under the liner as close as possible, then slowly lower the liner into place (once again, two people are recommended). Once in place attach it using the provided hardware or stainless steel screws or rivets. Install the inserts factory trim if applicable and slide it in as far as intended. You’re done inside, back to the roof.
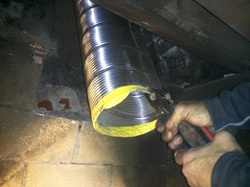
After completing the inside work return to the top of the chimney and slide the collarplate or top plate over the liner. Tighten the clamp around the top of the plate and trim off any excess liner. A saw-zall type saw is recommended for this, don't cut it short. Once the liner is the desired length remove the plate and apply a sealant around the top of the flue where the plate rests. High temperature silicone (up to 500F) is recommended unless the liner came with its own product. Re-tighten the clamp, install the cap and your done.
Browse our selection of chimney liners and liner kits for sale!

